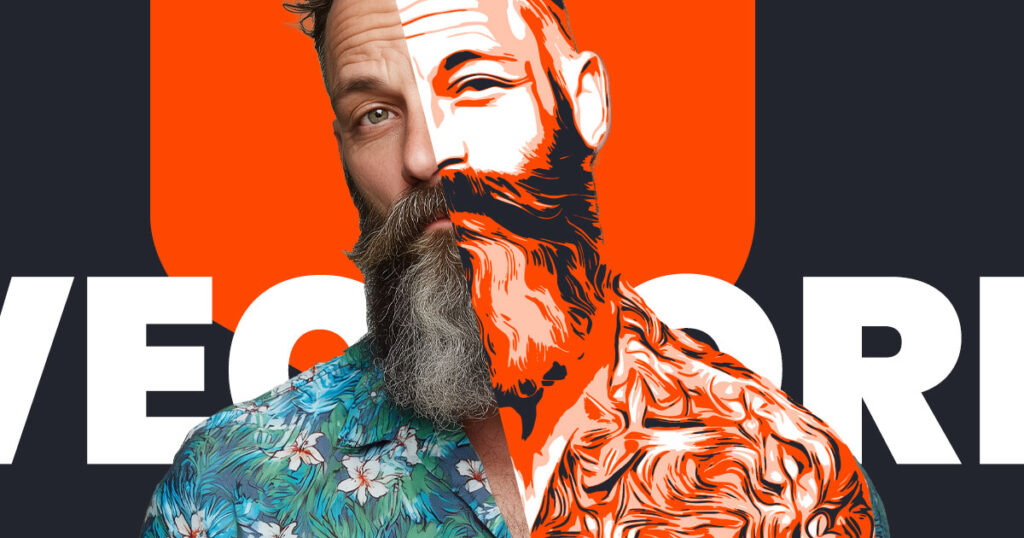
Create vector image in Photoshop — that’s what many users need when they want scalable artwork for T-shirts, stencils, laser cutting, or screen printing. If you’ve ever tried to print a T-shirt, cut a stencil, or prepare a design for a laser cutter, you’ve probably hit the same wall: You need a vector file, but you only have a photo and no access to Illustrator.
“I need a clean vector file, but I don’t want to learn a whole new software like Illustrator just for one project.”
Good news: You don’t need Illustrator to create clean, scalable vector artwork. Whether you are a professional designer or a hobbyist using a Cricut or Silhouette plotter, staying inside Photoshop for your vector workflow is now easier than ever.
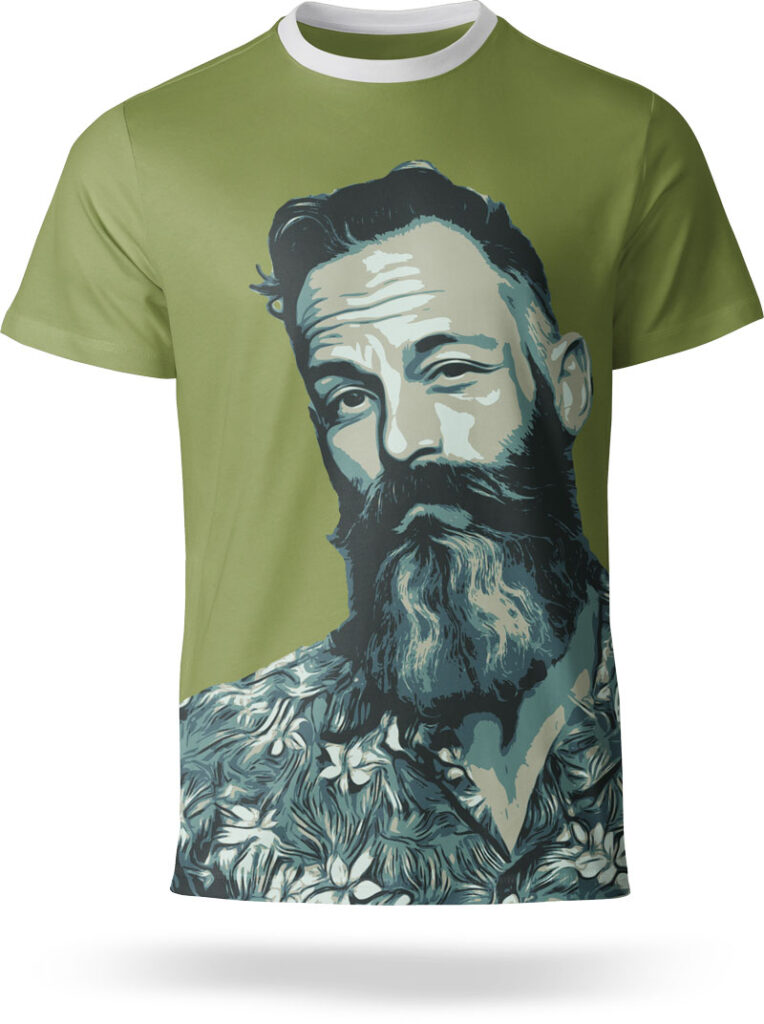
- T-shirt printing: Perfect for DTF, screen printing, flex, and flock.
- Stencil art & Plotting: Ideal for Cricut, Silhouette, and laser cutters.
- Merchandise: Any workflow that needs clear, simplified, and scalable shapes.
Here’s exactly how to create a vector image in Photoshop in 5 simple steps.
1. Start with the right kind of photo
To get a high-quality result when you create a vector image in Photoshop, your source photo should have clear contours and good lighting. The clearer the edges of your subject, the cleaner the final vector paths will be. Avoid images with too much noise or very busy backgrounds if possible.

2. Reduce the image to clean shapes
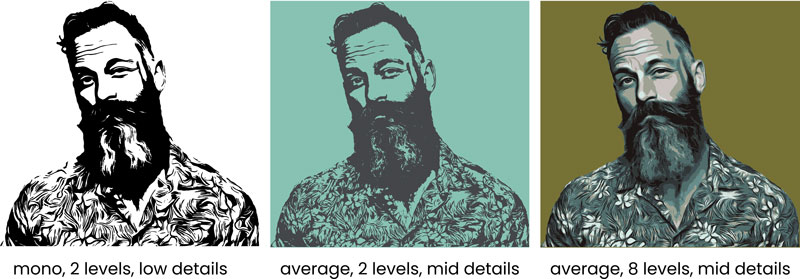
This is the most critical step. Photoshop itself doesn’t have a built-in “Image Trace” button like Illustrator. Standard adjustments like Threshold often create jagged edges and pixel noise that are not vector-friendly. By converting the image into simplified color blocks or grayscale steps first, you ensure the output consists of clean, closed shapes.
This professional conversion is exactly what Image2Vector was built for. It allows you to choose between Grayscale Mode (ideal for stencils and screen printing) and Average Colors Mode (perfect for stylized portraits and colorful merchandise).
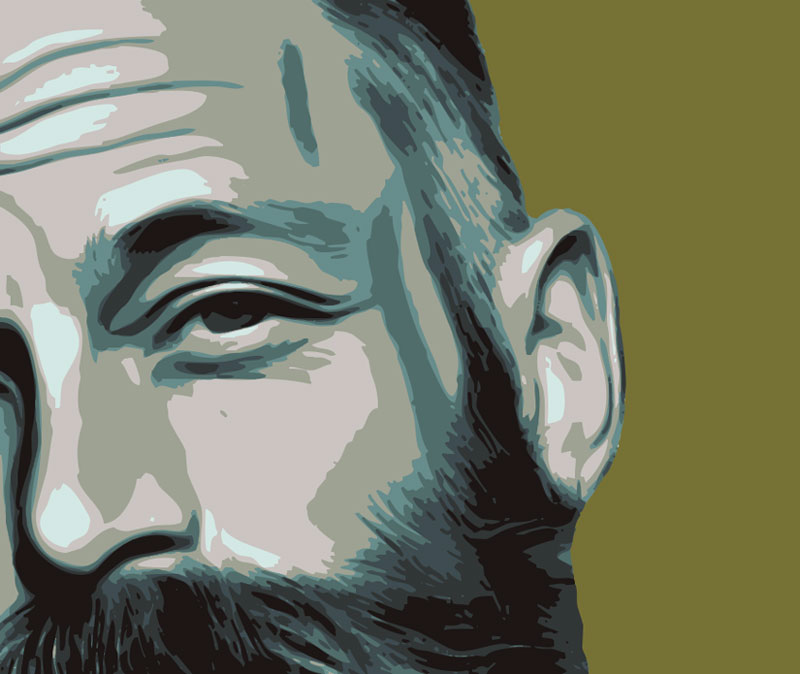
3. Create Vector Image in Photoshop with Sharp Boundaries
For technical workflows like laser cutting or screen printing, you need sharp boundaries rather than thousands of tiny tones. Focus on keeping a low number of color steps and high contrast. Image2Vector automates this by creating real, path-based shapes with solid fills that are easy to handle for any print or cutting software.
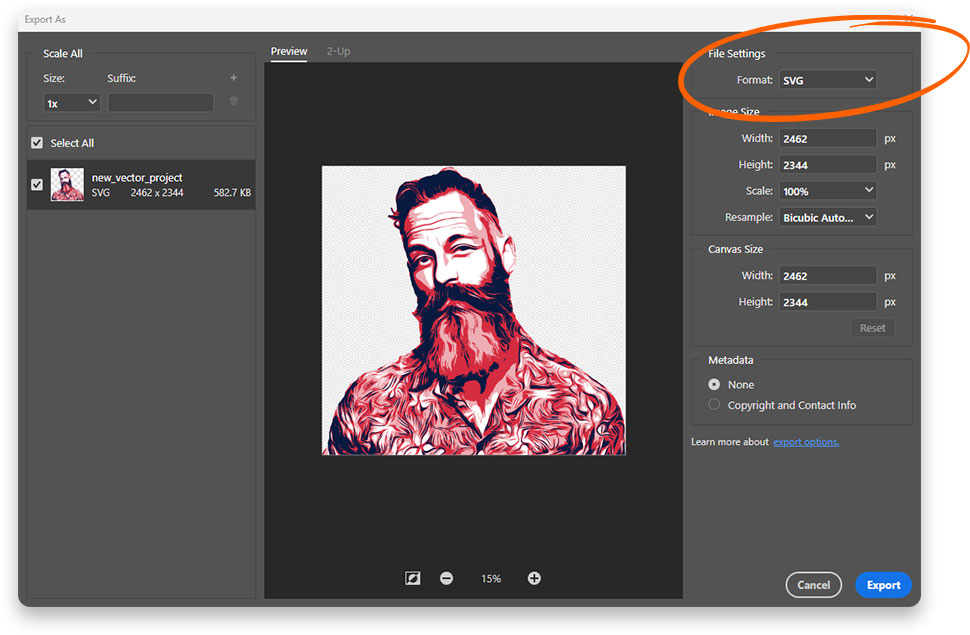
4. Export Your Vector Image from Photoshop as SVG or EPS
Once your shapes are generated, you can export them directly. Photoshop supports SVG (best for web and Cricut) and EPS (standard for professional print shops). Both formats preserve the real vector paths and solid color areas, ensuring your design stays scalable without any loss in quality.
Frequently Asked Questions
Can I edit Photoshop vectors in Illustrator?
Yes, absolutely. Since the SVG and EPS files contain real mathematical paths, you can open them in any vector app like Adobe Illustrator, Affinity Designer, or Figma to continue editing.
Is the result 100% scalable?
Yes. When you create a vector image in Photoshop using path-based shapes, the artwork can be scaled to any size—from a business card to a billboard—without pixelation.
What is the best format for laser cutting?
Most laser cutting software prefers SVG files. Ensure your paths are closed and simplified for the best results, which is exactly how our tool prepares the data.
Conclusion
You don’t need to switch between different apps to get high-quality results. Photoshop + the right conversion technique are enough to produce professional artwork for T-shirts, stencils, and merchandise. Start using Image2Vector today to simplify your design process.
Availability & Download
You can get Image2Vector directly from our shop or via the Adobe Marketplace. Both versions support macOS and Windows and work seamlessly within Photoshop CC 2021 and newer.
- Official Shop: Image2Vector Product Page
- Adobe Marketplace: Get it on Adobe Exchange