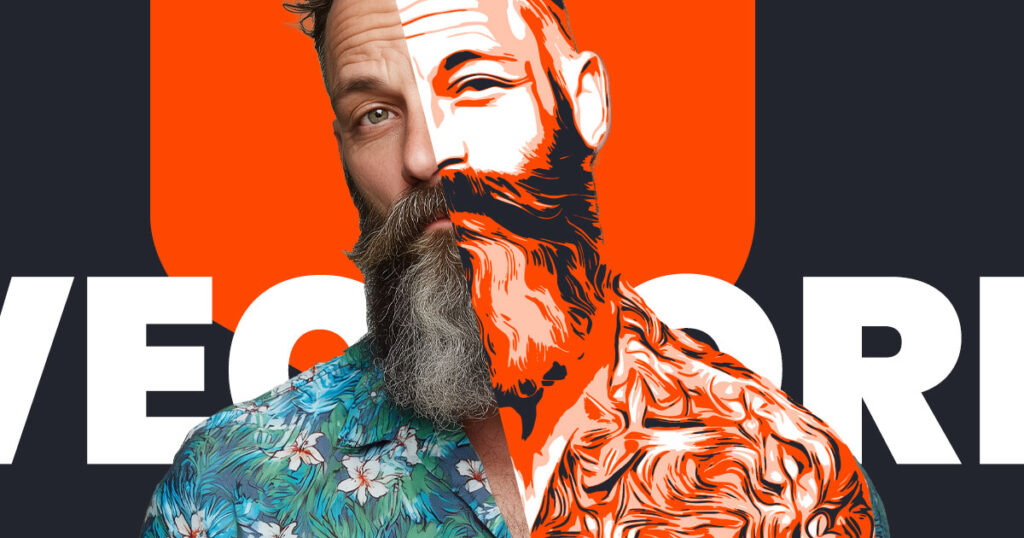
Create vector image in Photoshop — that’s what many users need when they want scalable artwork for T-shirts, stencils, laser cutting, or screen printing.
If you’ve ever tried to print a T-shirt, cut a stencil, send artwork to a screen printer, or prepare a design for a laser cutter, you’ve probably hit the same wall:
“They need a vector file.
But I only have a photo. And I don’t have Illustrator.”
Good news:
You don’t need Illustrator to create clean, scalable vector artwork — especially not for projects like:
- T-shirt printing (DTF, screen printing, flex, flock)
- Stencil art
- Laser cutting
- Plotting (Cricut, Silhouette, Brother)
- Poster printing
- Merchandise
- Any workflow that needs clear, simplified shapes
All you need is:
- Photoshop
- A photo
- A way to convert that photo into clean vector shapes
- The ability to export SVG/EPS
Here’s exactly how to do that.
1. Start with the right kind of photo
To get a good vector result, your photo should have:
✔ clear contours
✔ good lighting
✔ minimal noise
✔ a simple or uncluttered background
The clearer the edges → the cleaner the final vector.

2. Reduce the image to clean shapes
This is the key step.
Photoshop itself doesn’t have a reliable vectorizer.
Adjustments like Threshold, Posterize, or Cutout create:
❌ jagged edges
❌ pixel noise
❌ shapes that aren’t truly vector-friendly
But if you convert the image into simplified grayscale or average color blocks — and then vectorize those shapes — you get exactly what printing workflows need:
✔ clean, closed shapes
✔ no gradients
✔ no pixel edges
✔ scalable, editable color areas
This is the type of conversion Image2Vector is built for.
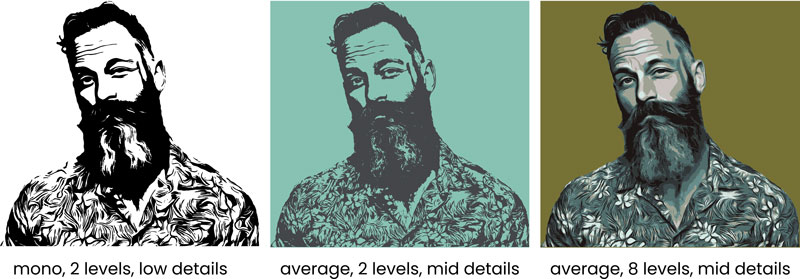
Choose between:
Grayscale Mode
Ideal for:
- stencils
- screen printing
- one-color T-shirt prints
- high-contrast posters
Average Colors Mode
Great for:
- poster-like artwork
- merch designs
- colorful illustrations
- stylized portraits
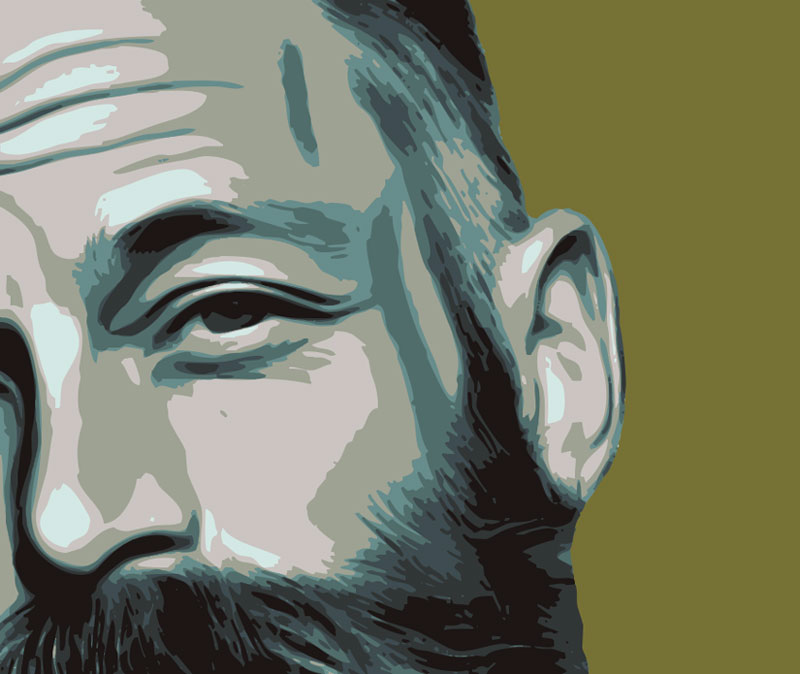
3. How to Create Vector Image in Photoshop Using Clean Shape Reduction
For stencils, T-shirts, screen printing and laser cutting, you need sharp boundaries, not 200 tiny tones.
That means:
- use a low number of color steps
- increase contrast
- avoid soft transitions
- keep shapes closed
- prefer solid areas over gradients
Image2Vector produces exactly those kinds of shapes:
clean, scalable, closed, easy for any print or cutting workflow.
4. Export Your Vector Image from Photoshop as SVG or EPS
Once you have your clean vector shapes, you can export them directly from Photoshop.
Tip: Exporting the Vector Shapes from Photoshop
The vector shapes created with Image2Vector are true path-based shapes with solid fills, which means you can export them straight from Photoshop — no Illustrator required.
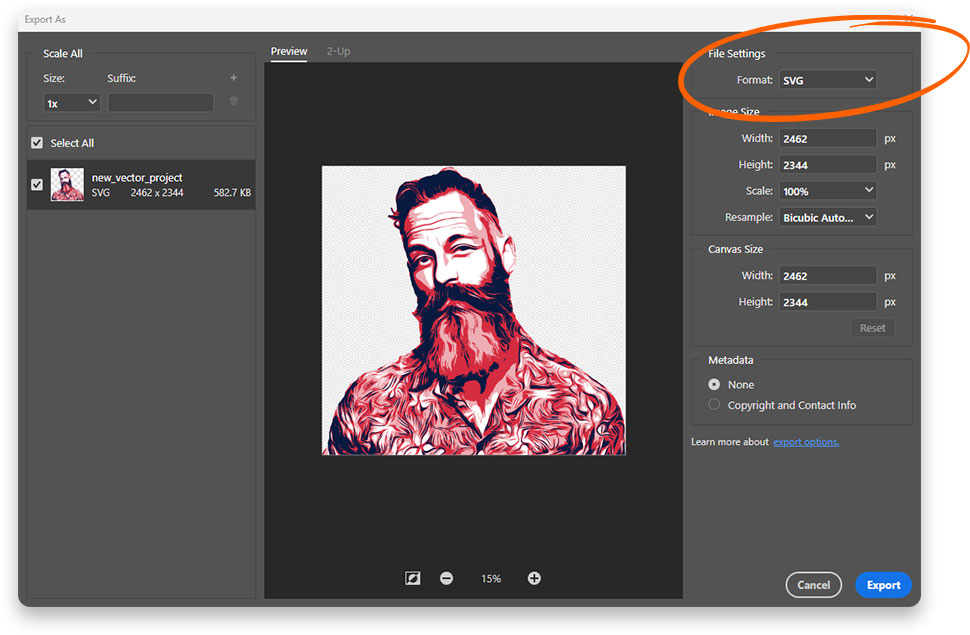
Photoshop supports two essential export formats on both Windows and macOS:
SVG Export
File → Export → Export As… → Format: SVG
Wikipedia SVG:
https://en.wikipedia.org/wiki/Scalable_Vector_Graphics
Perfect for:
- Cricut & Silhouette cutting machines
- laser cutters
- UI design tools like Figma
- web graphics
EPS Export
File → Save a Copy… → Format: Photoshop EPS
Best for:
- screen printing
- print shops
- Affinity Designer
- Illustrator workflows
Both formats preserve:
✔ real vector paths
✔ clean solid color areas
✔ scalability without any loss
✔ fully editable shapes
You can open the exported file in any vector app — Illustrator, Affinity Designer, Figma, CorelDRAW, or any vector-based cutting software — and refine colors, adjust shapes, or prepare print separations.

Example SVG result created with Image2Vector (Right-click → Save As to download).
5. What this technique is perfect for
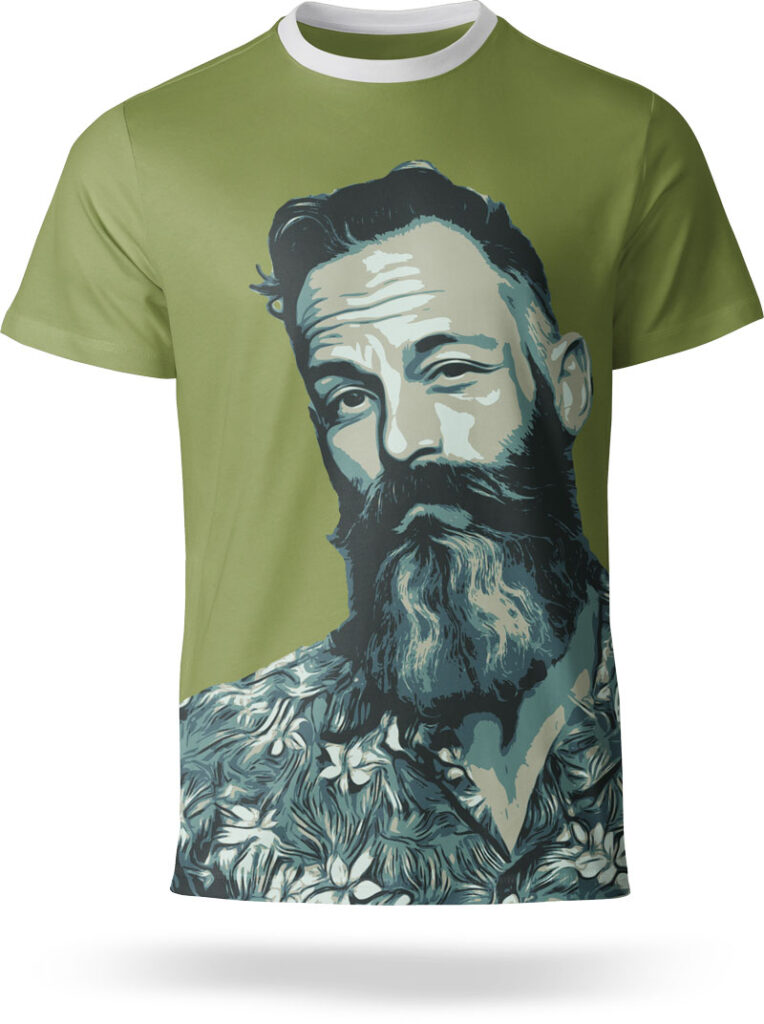
T-Shirt & Merch Designs
- 1–3 color prints
- crisp edges
- easy color separation
Stencil Art
- strong contrast
- clean lines
- ideal for cutting by hand or machine
Screen Printing
- solid shapes
- no gradients
- easy to convert into print separations
Laser Cutting
- closed paths
- uniform shapes
- instant cutting compatibility
Large Poster Prints
- no pixelation
- bold style
- scales to any size
Conclusion
You don’t need Illustrator to create high-quality vector artwork for T-shirts, stencils, screen printing, or laser cutting.
Photoshop + clean vector shapes are absolutely enough.
But if you do want to continue editing your artwork in Illustrator (or any other vector app), you’re completely free to do so.
Because the SVG and EPS export preserves real vector paths, you can open your file later in:
- Adobe Illustrator
- Affinity Designer
- Figma
- CorelDRAW
- or any vector-based cutting software
So you’re not locked into Photoshop — you simply get the fastest, simplest way to convert a photo into real vector shapes, with all professional workflows still available afterward.
Availability
Image2Vector is available through multiple distribution channels, depending on your workflow and preference. You can download it directly from our shop or install it via the Adobe Creative Cloud Marketplace for a fully native experience inside Photoshop.
Download options:
- Shop Product Page:
https://the-orange-box.com/product/image2vector/ - Adobe Creative Cloud Marketplace:
https://exchange.adobe.com/apps/cc/d4bc7081/image2vector
Both versions include the same functionality and support macOS and Windows in Photoshop CC.
Hi, I’m Mic, creator of The Orange Box. I develop Photoshop tools that simplify workflows and deliver high-quality results with one click — practical, modern, and built for real everyday use.